1970’s Laminate Kitchen Island Makeover
Today I am sharing our laminate kitchen island makeover with beadboard. This is a small island attached to the wall, that was in serious need of a facelift. It’s really hard to believe we kept it “as-is” for this long. But we had a few reasons for putting it off.
First, the kitchen island makeover is only a small part of the kitchen and we are doing updates in stages. Also because we have yet to do a full kitchen renovation, we put this project off, not realizing it could be done in one weekend.
Being able to do this so quickly was one of the pros of this project. Painting over laminate was definitely one of the cons. I’m not going to lie to you. The laminate needed serious cleaning and sanding before I even got to the painting. But, I’m going over everything step by step.
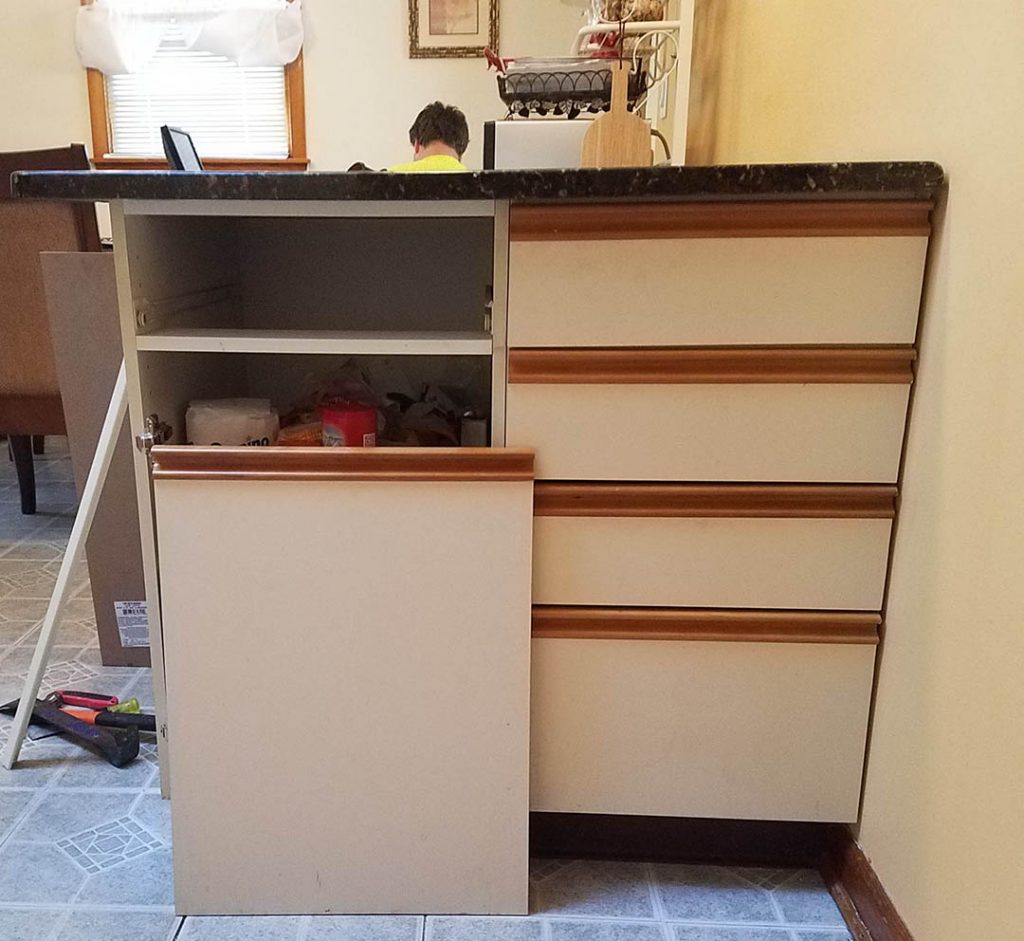
Our 1970’s Laminate Kitchen Island
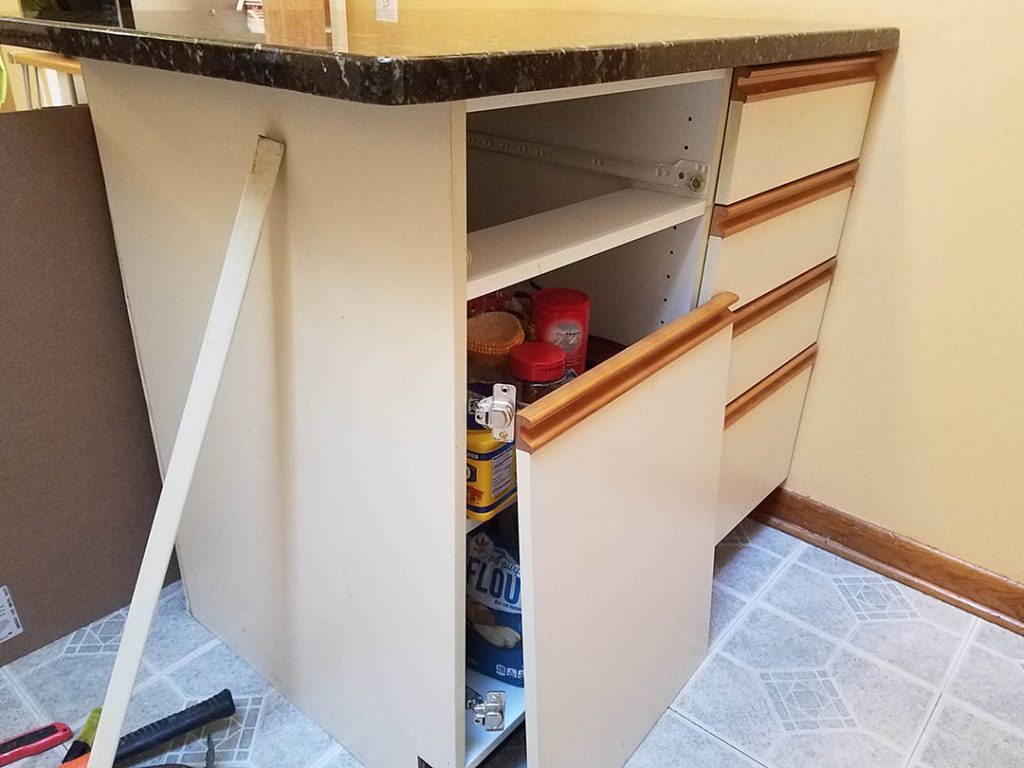
Here’s the original laminate kitchen island, shown below. Sorry, I didn’t take the picture before we started taking it apart. One thing you can see is that it never had any handles. The wood groove on the top of the door and drawers are what we use to grab onto to open and close things.
This is truly a 70’s design that was used in a lot of kitchens back then. The only thing I was worried about was if it would look OK with hardware?
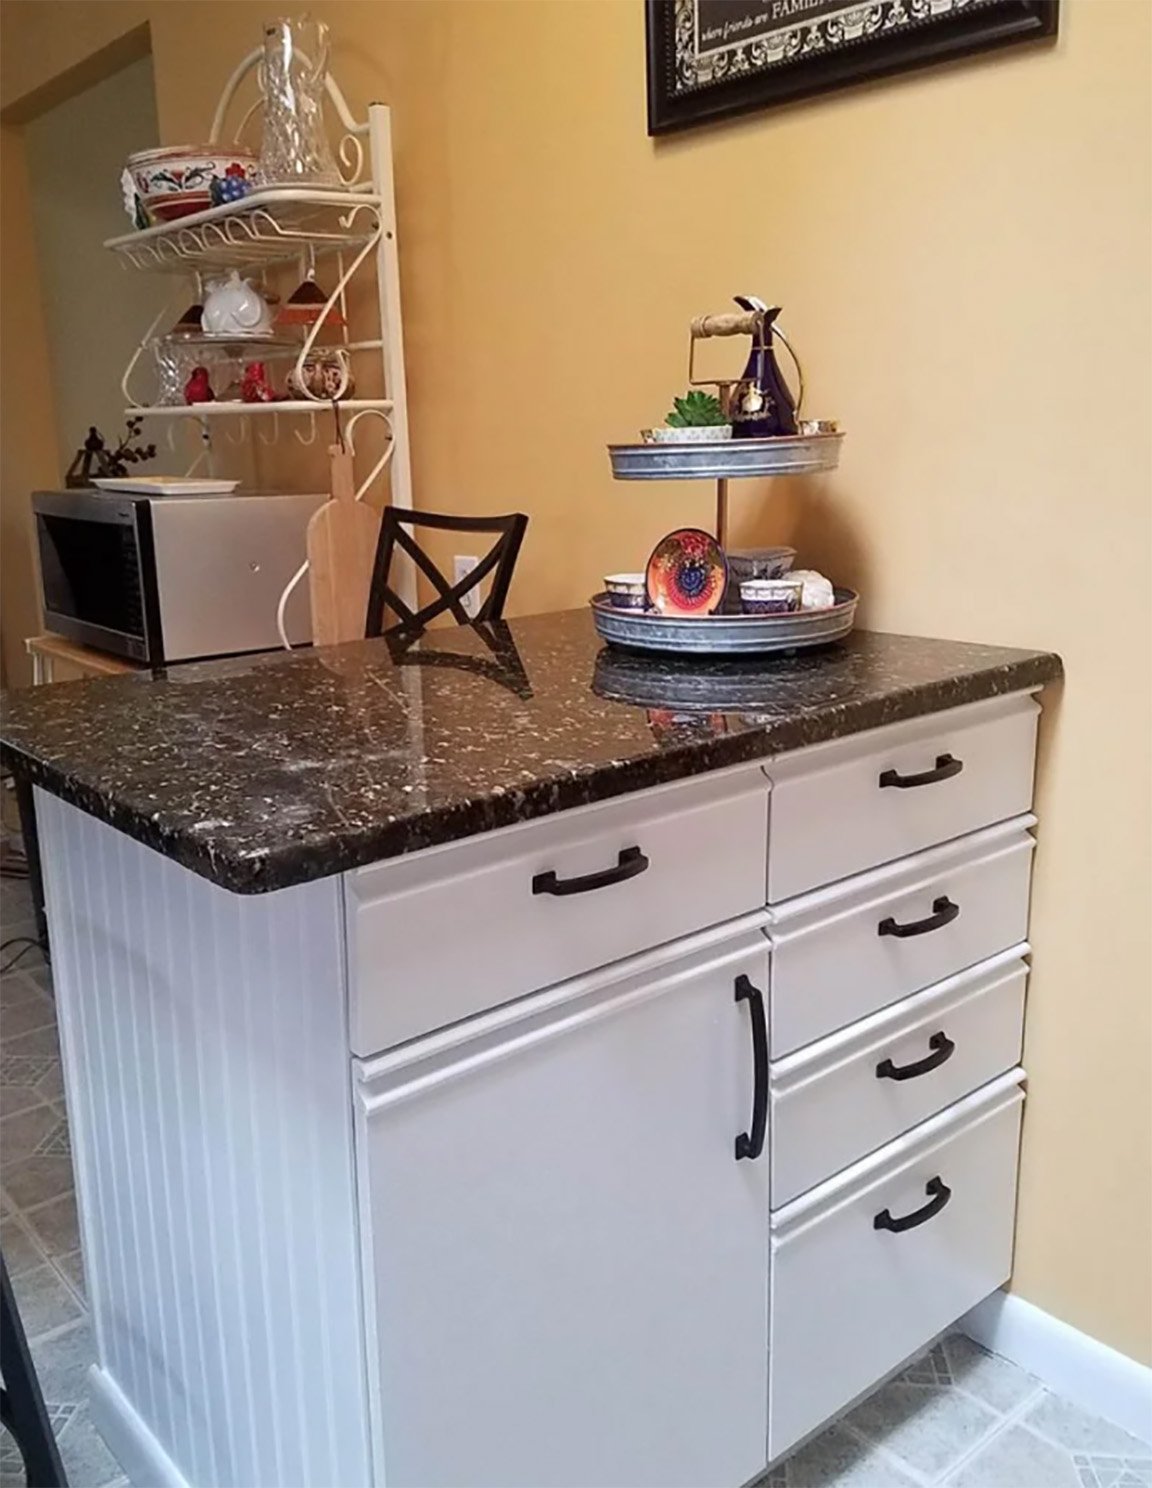
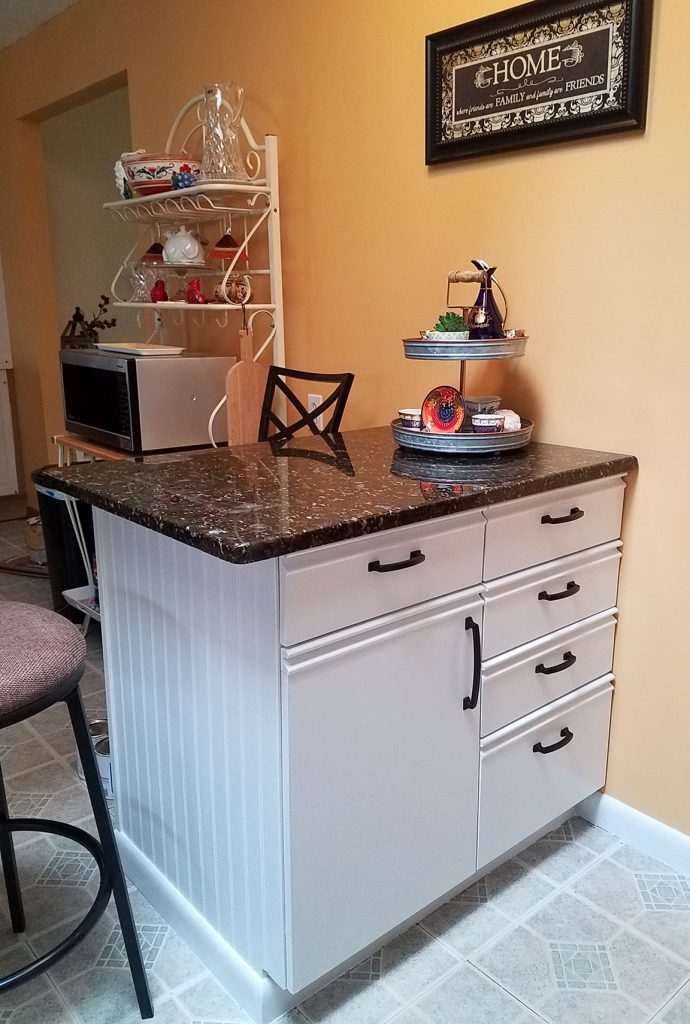
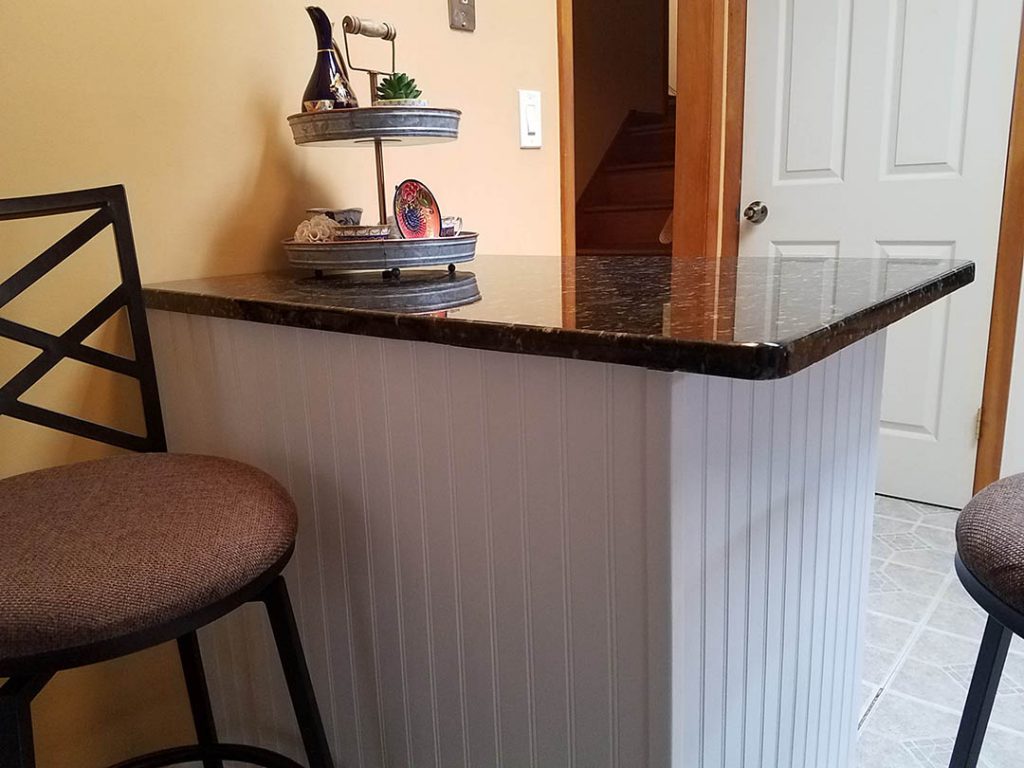
Now I’m happy to say, I really like the handles. They compliment the black granite top, and once everything was painted, they look like they always belonged there.
Wrapping Beadboard Around the Kitchen Island
While I spent my time prepping the surfaces for painting, my husband measured and cut the beadboard. The height of the beadboard is shorter than the counter. So we fit the bottom with molding to make up the difference.
Once the pieces of beadboard were cut to size, we applied an adhesive to the back. Next, I held it in place while my husband secured it to the counter with screws.
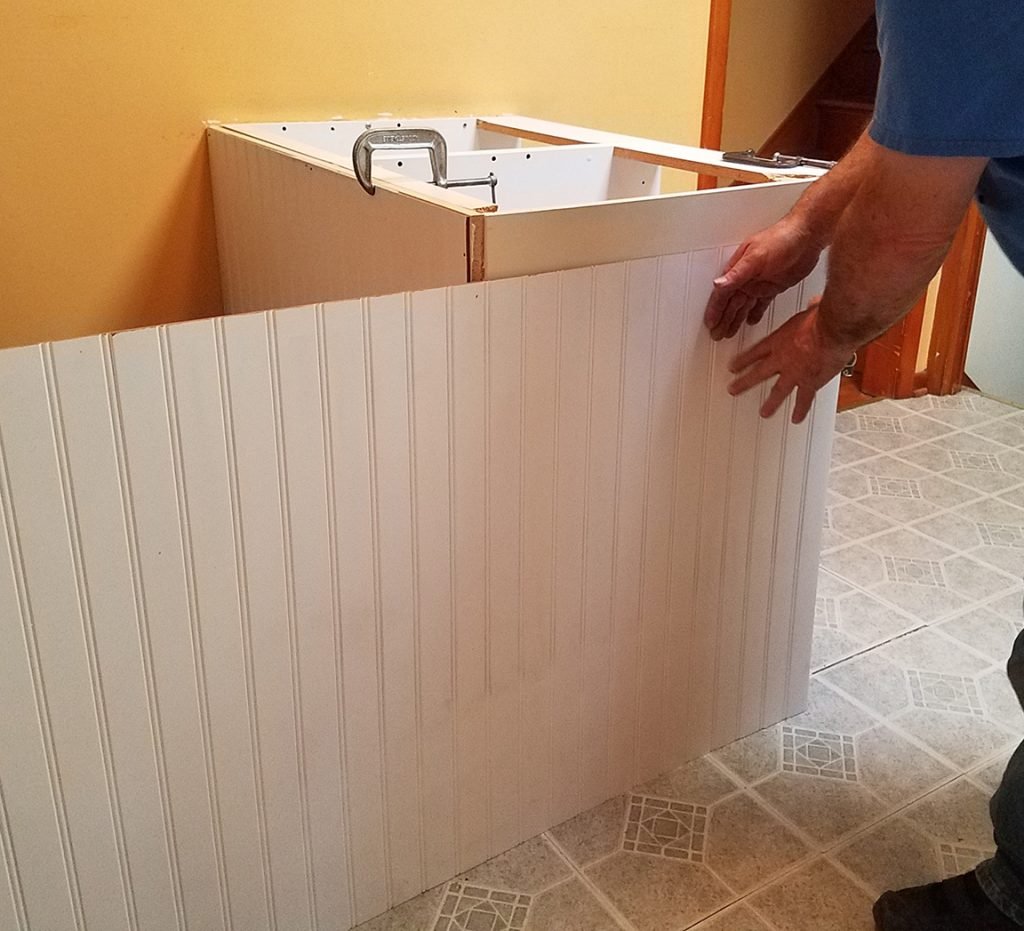
Even with the screws in place, you should clamp the beadboard to the sidewall while the adhesive is drying, to prevent buckling. The beadboard needs to be completely flush against the sides because it is only screwed on along the edges. So be sure to press any air pockets out or excess adhesive. After that, you can add additional screws along the edges.

Prepping a Laminate Kitchen Island for Painting
To begin our laminate kitchen island makeover we removed the granite countertop. It was never glued down, so it lifted off cleanly.
Next, we unscrewed the drawer faces from the drawers and numbered them, so they could be matched up later on. Then we removed the hinges and screws and put them aside.
What I forgot to do is number where each drawer went back into. Just sharing since later on I had one drawer that was rubbing because it was in the wrong space.
The prep before painting involved cleaning the pieces with soap and water, to get rid of grease and grime. Once everything is washed and dried it’s time for sanding.
I used my Ryobi Corner Cat Sander for the flat surfaces. And for the wooden grooves, I used 150 grit sandpaper to get in there by hand.
While sanding, you should wear a face mask, so that you don’t breathe in the dust.
Not only do you not want to breathe that in, but you want to be sure to remove all the dust from the areas you’ve sanded. For this, just wipe the surfaces with a dry cloth, until they are completely dust-free.
Painting the Laminate Kitchen Island
When it comes time to choosing paint for laminate, you need to choose a paint and primer that work together. For this project, we chose a water-based Behr Latex paint with a semi-gloss finish. For primer, I picked Zinsser Bull’s Eye 1-2-3 Primer, which is also water-based.
Water-based paint offers advantages that definitely appeal to me. The main reason I prefer using them indoors is that they don’t have a strong odor. If fumes are something you have a low tolerance for then water-based latex paint is a good choice. It also cleans up easily, which is another advantage.
With that said, there are some disadvantages. Using a water-based paint and primer over laminate requires a lot of sanding. Now because I only had a few pieces to paint, I didn’t mind doing the sanding.
If this had been an entire set of kitchen cabinets, I would have used oil-based, as it would require less sanding.
Pay Attention to Small Details
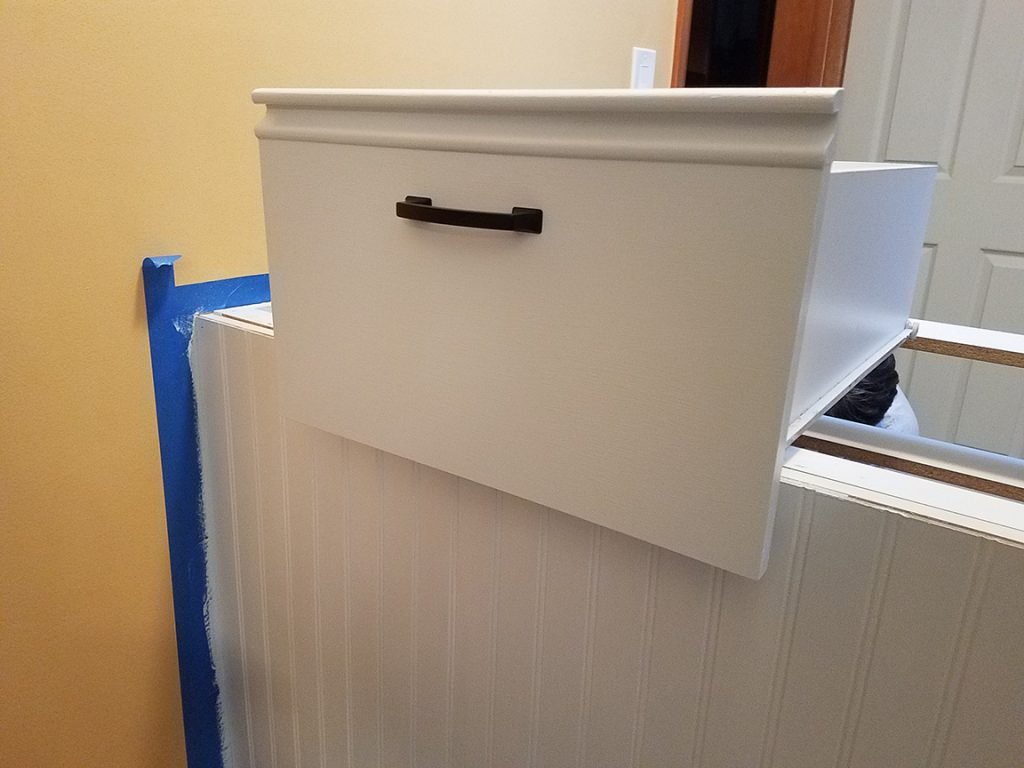
The original color of this laminate kitchen island was off-white, which is why we painted the inside edge facings of the cabinet. This just gives it a complete finished look, when the door or drawers are opened.
You can also see in the above photo a long strip of laminate. This is the corner piece that gives the two sides a finished look, so we were sure to clean and sand it well before painting.
When doing a laminate kitchen island makeover, paying attention to small details like this will make your project turn out better.
Laminate Kitchen Island Makeover: Front
Laminate Kitchen Island Makeover: Back
Materials and Supplies Used
- Beadboard
- Adhesive
- Molding
- Zinsser Bull’s Eye 1-2-3 Primer
- Behr Semi-Gloss Latex Paint
- Blue Tape
- Screws
- 150 Grit Sandpaper
- Ryobi Corner Cat Sander
- Paint Trays
- Paint Tray Liners
- Paint Brushes and Rollers
Please note that this blog post has affiliate links in it, as Always Home Love is a participant in various affiliate programs. This means that if you click on a link to a third-party website that I have an active affiliate agreement with, and if you happen to make a purchase, I will be compensated a commission.